


It’s the One Room Challenge Week 2, and things are moving quickly (and slowly… ha!).
Before we can get to the really “fun” stuff… we had to tackle some logistical issues.
Even though this is a very small space (a little less than 100 square feet)… I (of course) had to move lighting, add lighting, tear down moulding (more on that later) and shift an attic access to the closet before we could even start to paint and wallpaper. If you don’t remember “the plan”… head back to Week 1 to see where this is going!
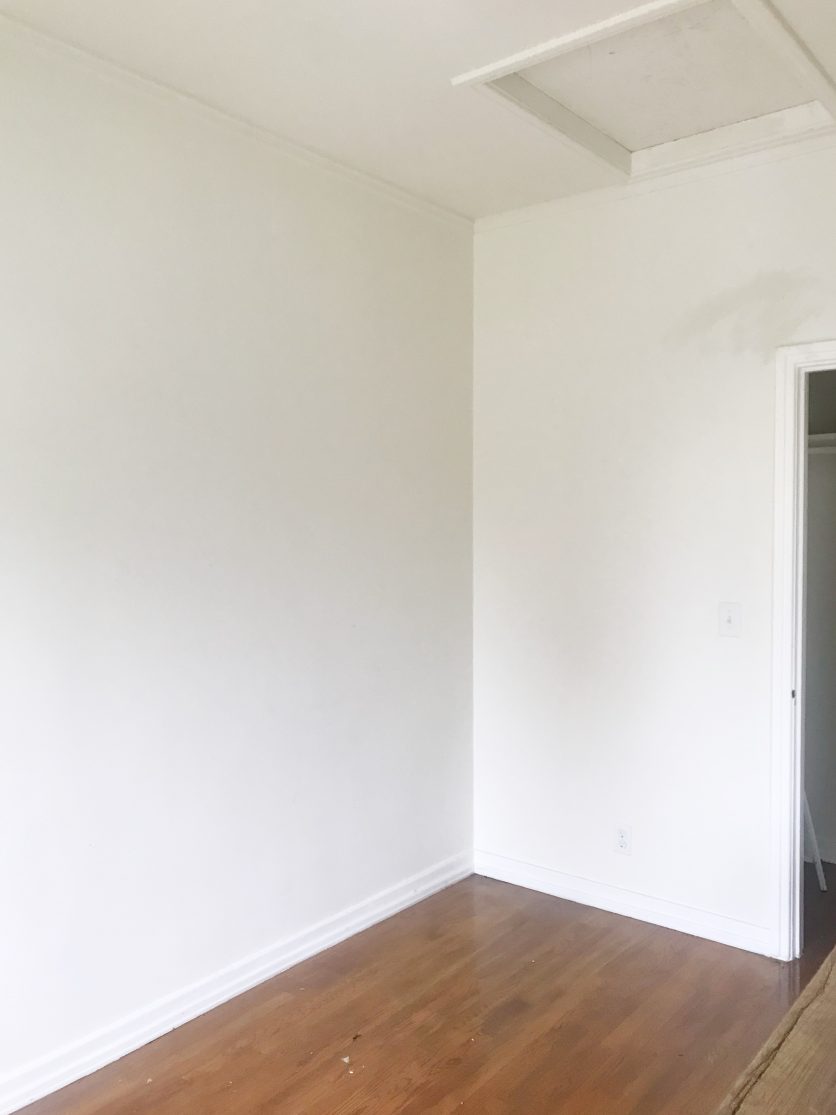
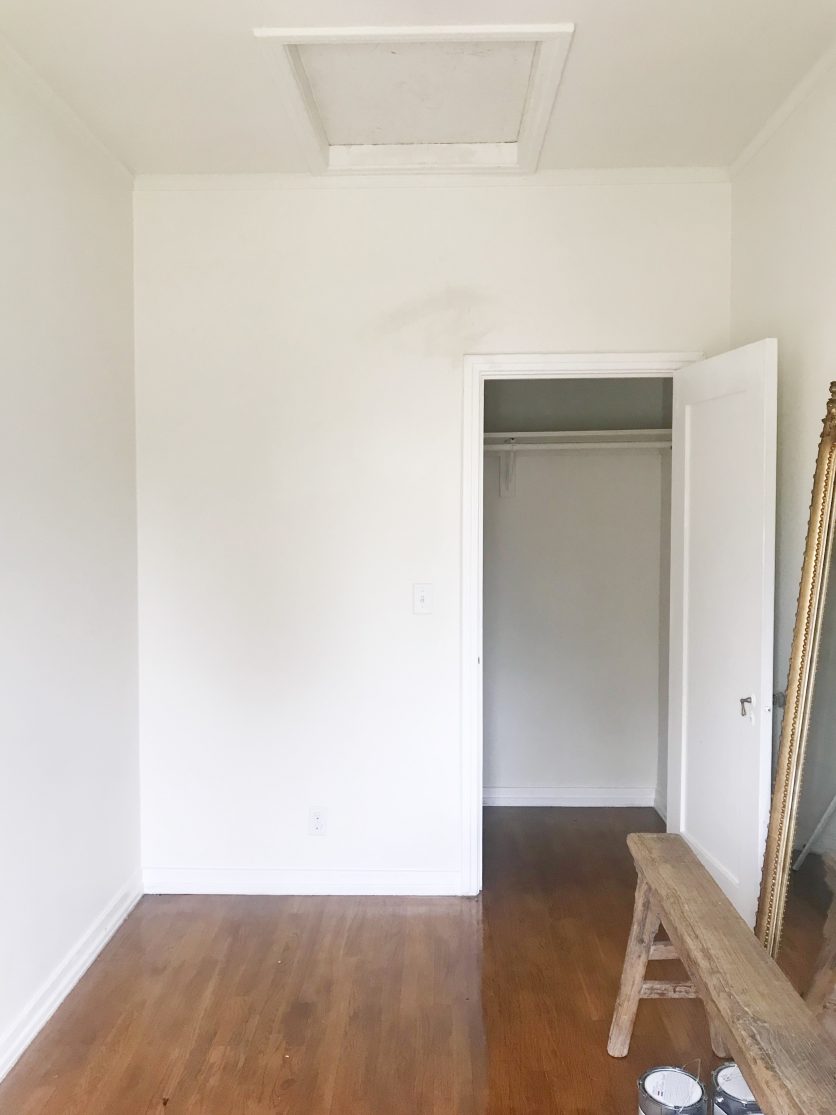
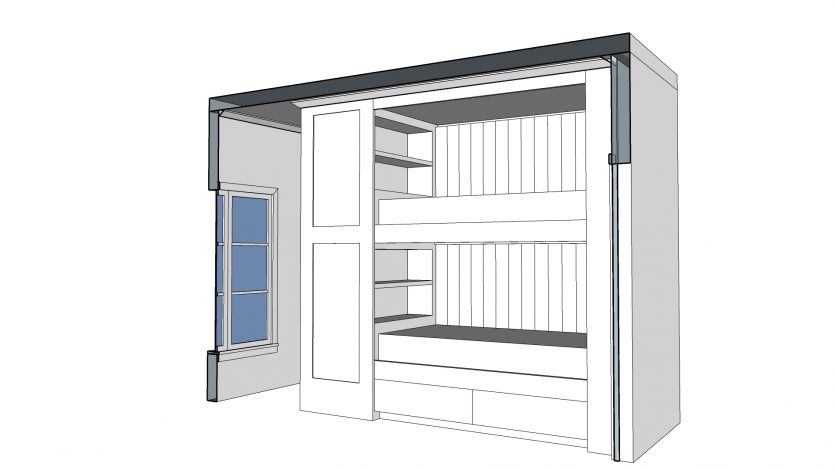
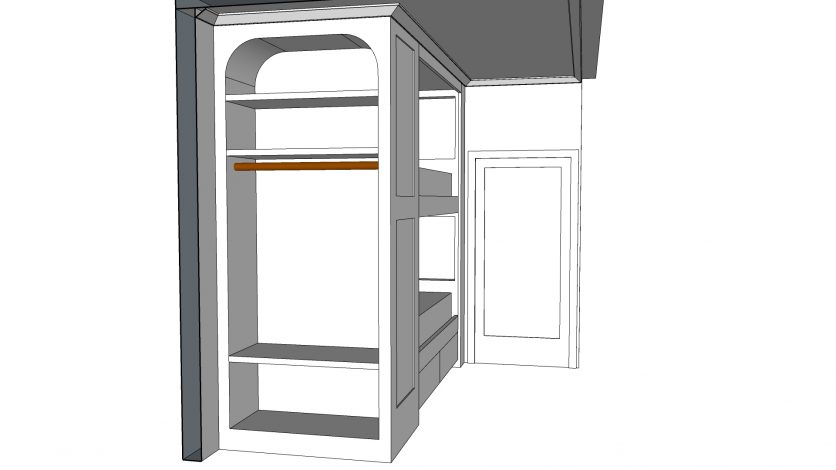
As seen above… our attic access took up some huge real estate on our ceiling, and because we decided to build floor to ceiling bunk beds that will fit in the space from the wall to the closet opening… we needed to get some of that real estate back!
And just like that… it magically disappeared!
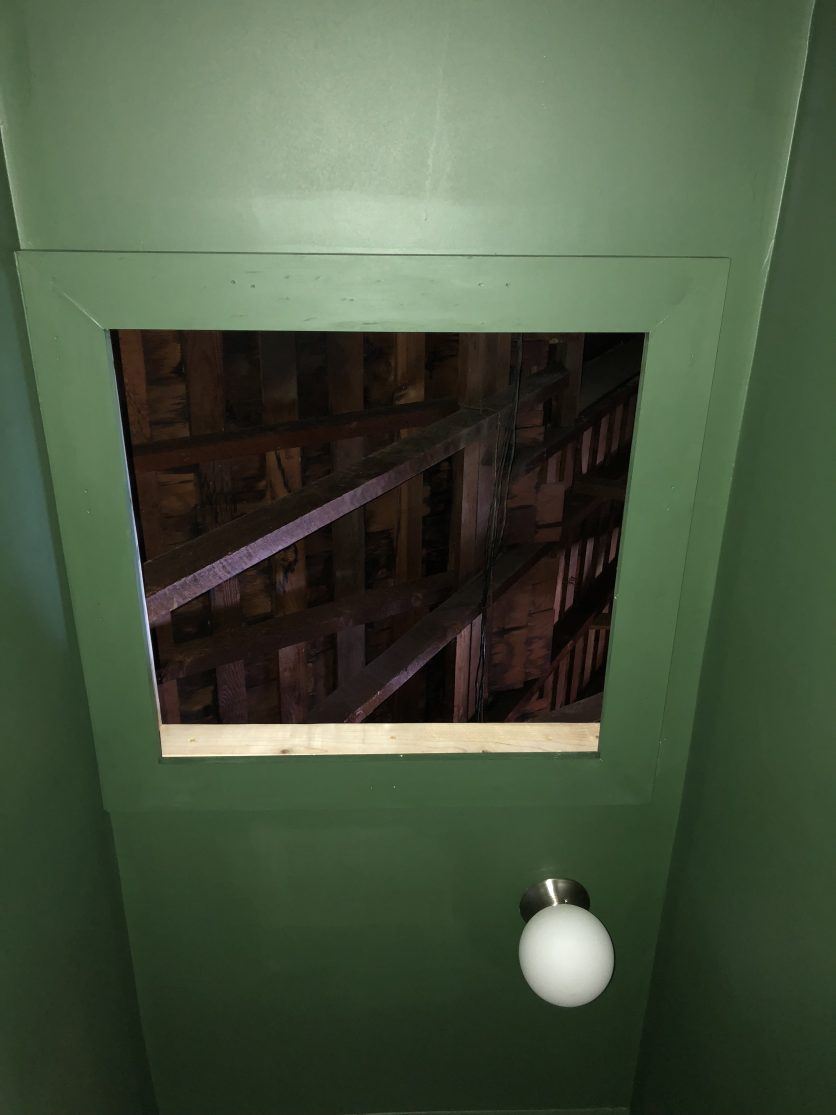
Just kidding… we had to patch and repair the ceiling and move the access into the closet, which meant we had to break the ceiling open in there and create a MASSIVE mess.
But isn’t that better?
We also had some lighting issues to solve.
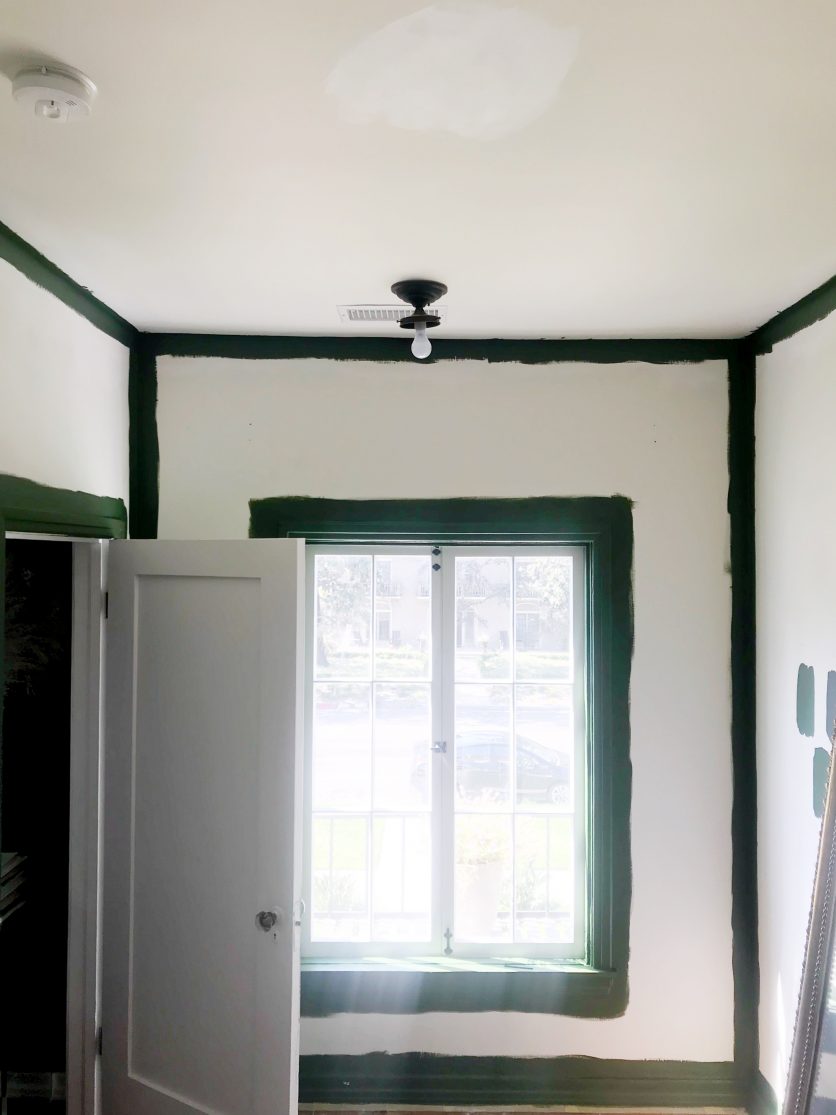
See that white patch on the ceiling? That’s where the original light fixture (pictured… and obviously not the final product) was located.
My beloved bunks would be “butting heads” with the light if it remained, so I needed it moved.
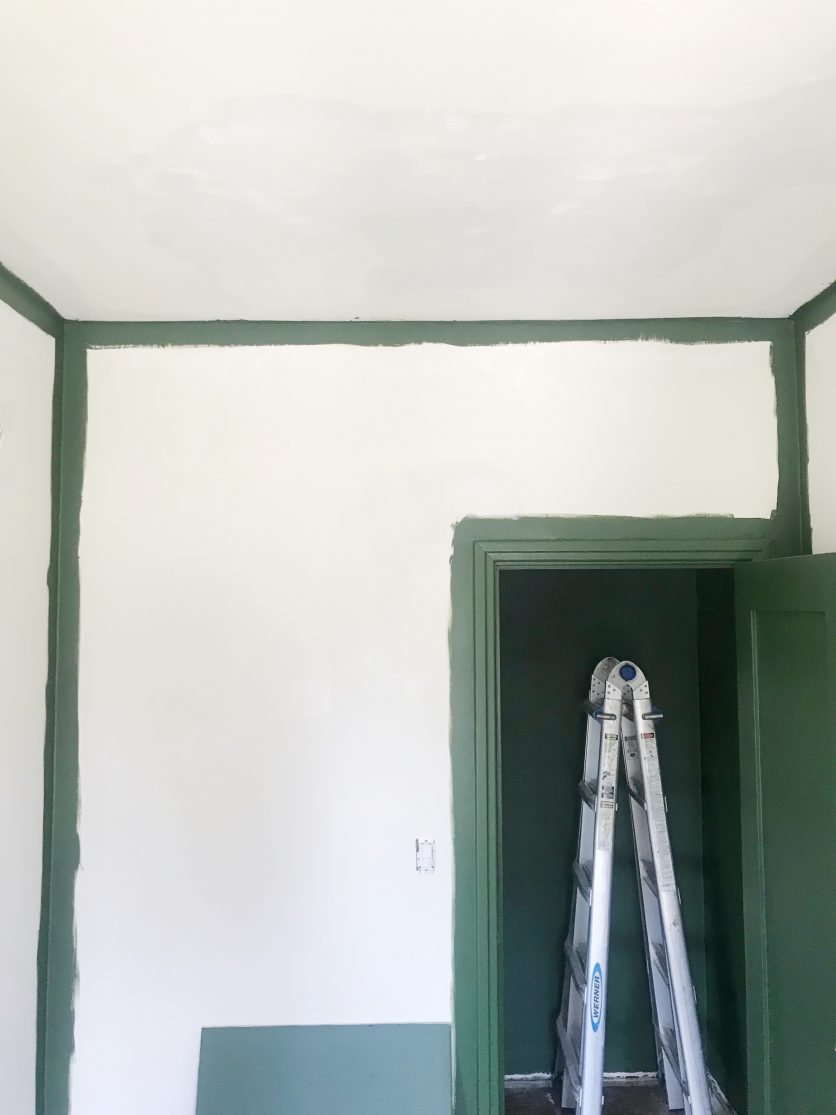
See where the fire alarm is? I wanted the light to go just next to it… but it ran into some problems there too (up in the attic).
I had to compromise with where you see it now, which I am not one hundred percent happy with. In fact… I am wondering if I want to scrap the overhead light all together as I am typing this!!!
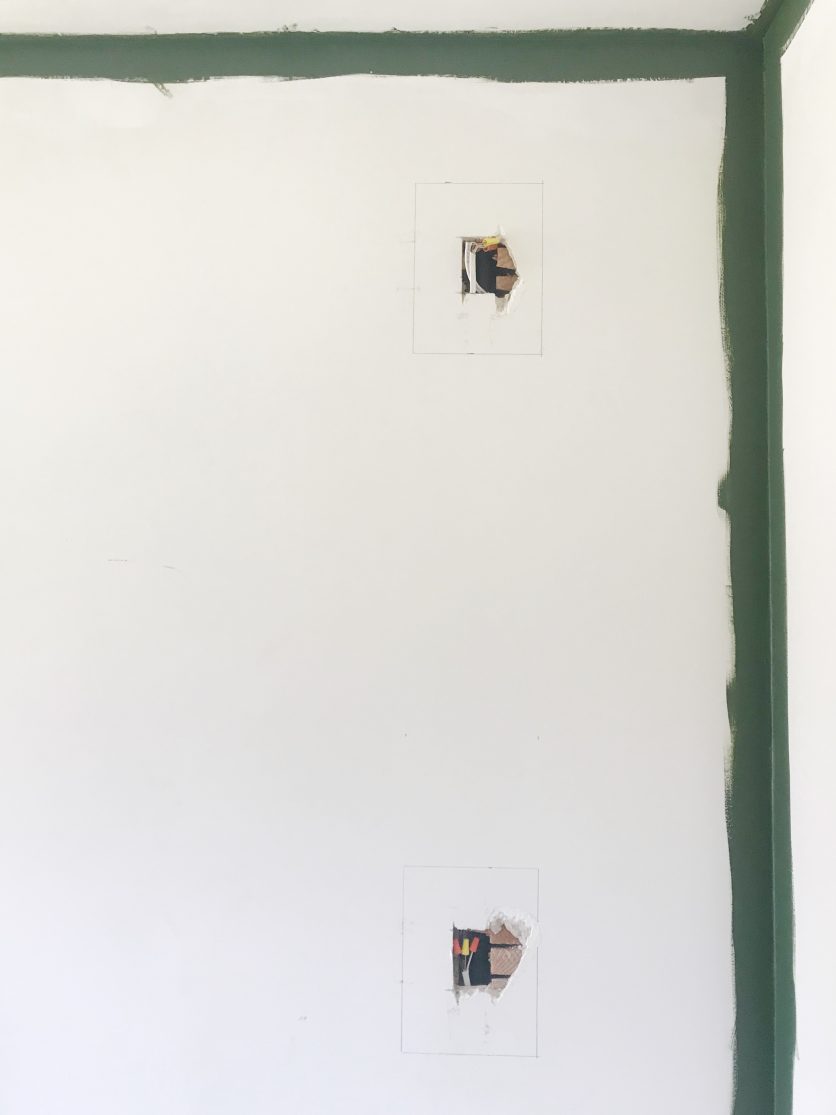
These two new holes in the wall? They will become sconces for the inside of the bunk beds.
Isn’t this just the most exciting stuff?
Also…
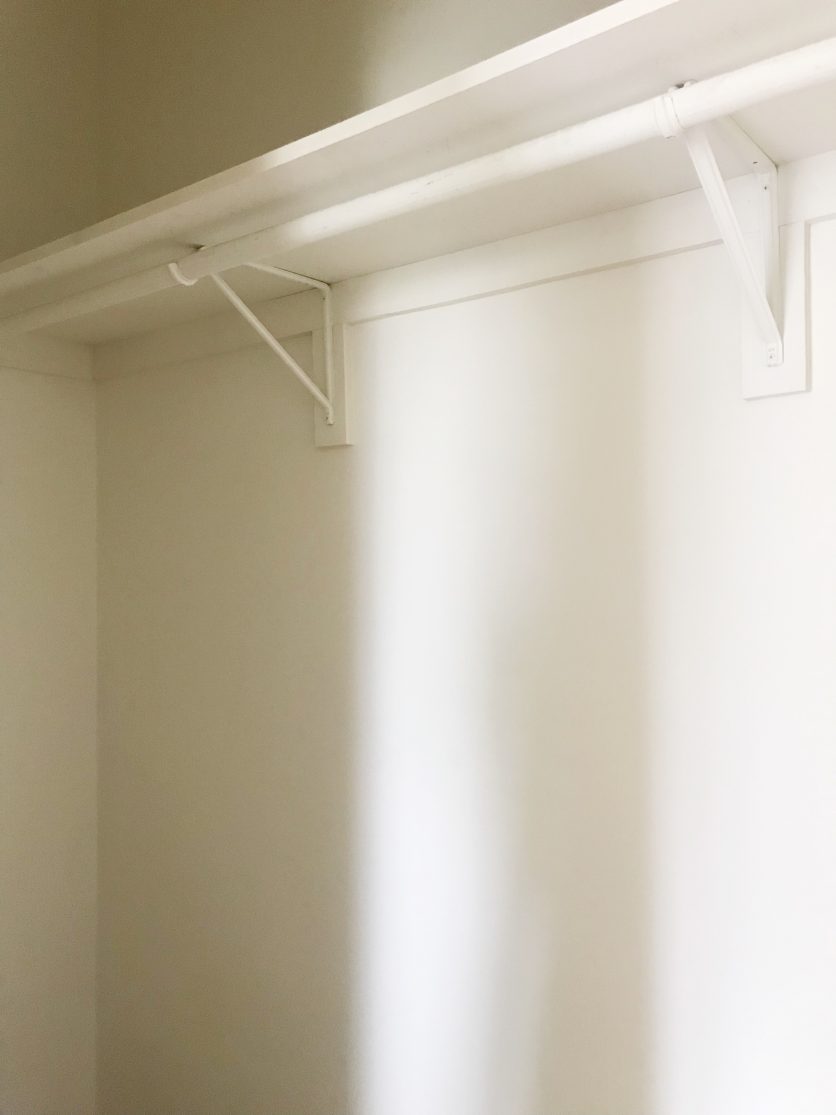
Remember this?

It now looks like this… and is ready for California Closets to come give it a MAJOR makeover! We also moved the light forward in there too (my handyman… the unsung hero of this project… LOVES me right now).
Now let’s talk paint!
I have been PINING to use green somewhere in my house since we moved in. Originally… I wanted to use it in the kitchen, but I decided I liked it white and bright in there.
So when this opportunity presented itself… I knew green was going to be winner winner chicken dinner.
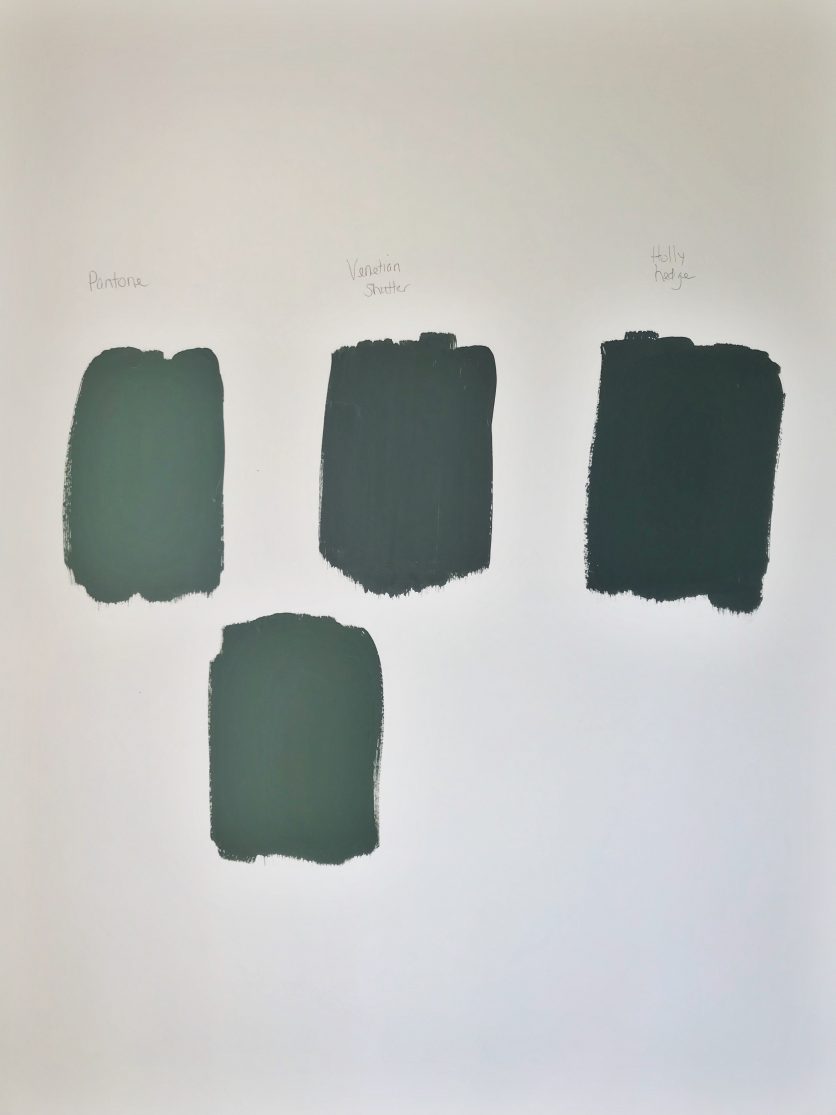
Fine Paints Of Europe, our amazing paint sponsor, worked with us on finding our green… and I could’t be happier!
It’s going to look different in every one of these photos (because they are on my iPhone)… but can you tell which one we picked? If you can guess, I’ll give you five stars… because it’s TRICKY.
I will reveal it next week with some pretty photos of the freshly painted room and wallpapered ceiling 🙂 .
Originally I wasn’t going to paint our closet, but our amazing California Closets designer, Nicole Caswell, told me to take the green all the way inside and to make it an extension of the room. I wholeheartedly agreed, especially since the closet will be so pretty I can’t ever imagine wanting to shut the door!
Ok… ready for some eye candy and a little teaser for what’s to come?
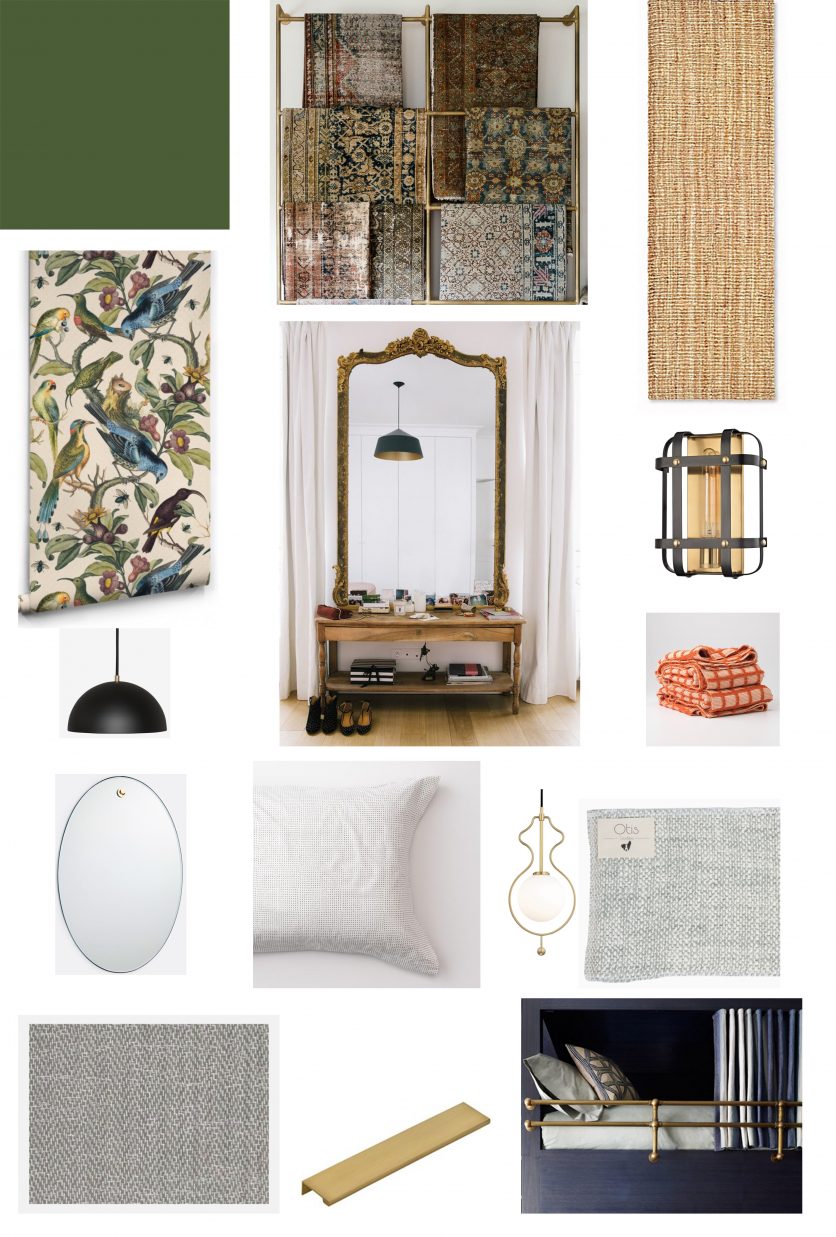
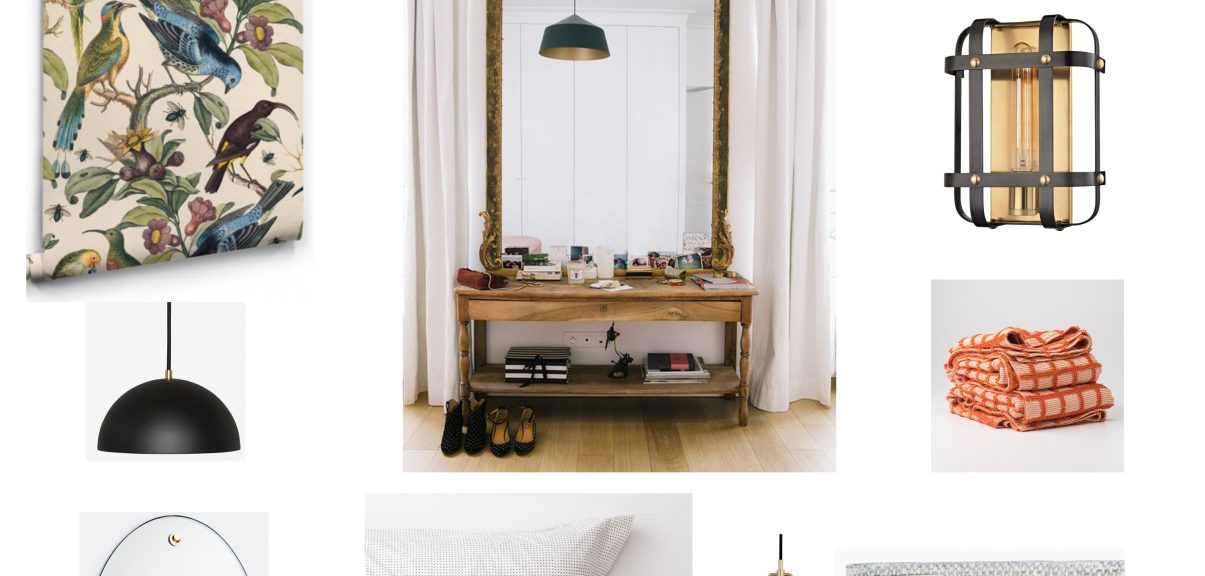
Here is the mood board!!!
Think cozy, European bed & breakfast bunk room that feels like a vintage suitcase! Does this make sense? Welcome to the inside of my brain… ha! I’ve gone into some details below, but you will get EVERYTHING in the final reveal.
- We have a gorgeous green from sponsor Fine Paints Of Europe that my team and I lovingly call the green “womb” (real name to be revealed next week).
- Those brass poles and rugs? Inspo for the “headboards” on the bunk beds… stay tuned 😉 .
- If you know me… you KNOW I love to wallpaper… so you better BET your bottom dollar I’m wallpapering something (or two) in this room. I picked this floral birds and bees print from sponsor Milton & King!
- If you’ve been peeking at my stories on Instagram, you’ve probably since glimpses of an insanely gorgeous antique mirror from Chairish!
- Lighting is from our wonderful sponsor Hudson Valley Lighting. The sconces actually recall the old-fashioned leather strapped luggage I was thinking of when researching this project, and the curved pendant is for the closet!
- The patterned finish on the bottom left corner? That’s for the cabinetry in the California Closets makeover… also reminiscent of some old-timey luggage, no?
- The super chic gold pull you see is from Emtek, and they will go on the bottom two drawers of the bunk beds.
- Finally, my super saucy metal worker Anna from Bananas & Hammocks is working on some custom railings for the bunks. Because of limited space, we will have to attach the railings from the front face panels like the example above.
Oh… and the actual bunk beds? I’m going to show you version #2 (We’re on version #4 now) of the sketches by Kevin & Paige… because I like to tease (I can’t give you the whole shebang at once!)…
Whoo hoo! Come back next week to see ACTUAL photos of the paint and wallpaper installed, renderings with the railings attached, and a whole story about how sexy your mattresses can be (like… in addition to when you’re having sexy time)!
Have you checked out what everyone else is doing yet? You better GO… it’s week 2… it’s getting EXCITING!


